Thread Theory

Welcome to the new era of menswear sewing. Go ahead and create something exceptional!


2 Comments

Day 8 – Finishing the Shorts! (Jedediah Shorts Sew-along)

Edited-1

This is it!  The last day of the Jedediah-Shorts Sew-along!  Today we’ll be sewing the cuffs, or if you prefer, sewing your 3/4″ hem.  To accompany us as we finish our epic sewing process is some epic Gregorian Chant.  Is this not what you usually listen to while sewing?  Well you should!  Nothing like solemnly belting it out along with the rest of the choir while you victoriously finish the final step of a project 🙂

First things first, put your shorts/pants on the wearer and make sure that they will end up being the proper length.  I pre-folded the cuff and pinned it in place so I would see exactly where it would fall.

Edited-2

We decided that Matt liked the ‘hipster’ length that I cut his previous pair of Jedediah Shorts to sew we took two inches off of this pair as well.  If you are going to hem the shorts using a 3/4″ hem instead of the cuff, you will need to take even more length than this off so that your shorts don’t end up looking like capris!

Edited-3

Now that we’ve determined the proper length, we can go ahead and sew the 3/4″ hem.  First, fold the hem up 3/4″ and press:Edited-4

And fold up the hem 3/4″ again, press and then pin in place:Edited-5

Now, we are ready to finish the hem by stitching 1/8″ away from the top edge, all the way around the pant leg.  I like to start at the inseam so that the back stitching isn’t very visible when the shorts/pants are being worn.Edited-6

Okay, time for the cuff!  This is a quick and dirty version of a cuff that I designed to look like the shorts have been casually rolled up (and what better way to display the awesome binding fabric you chose?!).  All you have to do to form the cuff is fold up the hem, with right sides together 3/4″ and press:Edited-7

Then fold up the cuff again, this time 1 1/2″ and press again.  Put a few pins in the roll to keep the side seams lining up.Edited-8Edited-9

And now, stitch in the ditch along each side seam to keep the cuff in place!  It’s as simple as that!  If you are using a floppy material (such as linen), you could hand tack a few spots along the top of the cuff so that it doesn’t flop downwards in the middle, but if you are using a stiff denim or twill you won’t have to worry about that.Edited-10Edited-11

And we’re done!!!!!!! Yahoooo!!!!!Edited-12

Here is a photo gallery of my version of the Jedediah Shorts(below).  We’re so excited to see what you’ve sewn up!  Kollabora is so kindly hosting a Jedediah Shorts/Pants Sew-Along Photo contest (as you probably saw in the earlier blog post about it!) – so be sure to head on over there and submit your photos for a chance to win an awesome Kollabora gift package as well as a free Strathcona Henley pattern!  All you have to do is submit your project and the person with the most ‘hearts’ by September 17th will be declared the winner by the Kollabora team!

You can also send along your photos to our email (info@threadtheory.ca) or post them on your blog and other sewing network sites and leave a comment on this post telling us where they are and we will add them to our “Jedediah Pants Photo Gallery” as well as our Sew-Along parade post next Thursday.

Thank you so much for joining us on our first sew-along!  We had a lot of fun and hope that you did too!  Please feel free to refer back to our sew-along page whenever you sew up the Jedediah Shorts or Pants in the future, and if you ever have questions, you can still leave comments on any of the sew-along posts and we will help you out the best that we can!

Triptych


22 Comments

Day 7 – The Waistband and Belt Loops (Jedediah Shorts Sew-Along)

Edited-22

After yesterday’s success with the fly, you’re ready for anything, right?  Well here’s what we have coming at us today: The belt loops, the waistband and then, the button/closure on the waistband.  A big day!  But it’s totally achievable (and couldn’t really be separated) because the belt loops are finished after the waistband has already been started…so before you know it all you will have left is hemming!

First off, iron your fusible interfacing onto the waistband piece if you haven’t already.  I like to use a medium weight interfacing for this but you might also like to try a heavier interfacing if you are using something thin such as a linen.  It’s nice to have a lot of structure in this area.

Next, I’ll show you my belt loop method that DOESN’T involve making a tube and turning it (painstakingly) the right way out…I really can’t stand doing that!  Instead, we’ll prepare the belt loops by folding in each long edge 3/8″ and ironing.

Edited-23

We can now fold them in half and iron, just like making bias binding.
Edited-24

To finish the edges, all we have to do is top-stitch 1/8″ from either edge (the folded edge and the open edge) and give them a press.
Edited-25

To make enough belt loops for the shorts (or pants), just cut each belt loop in half.

Edited-26

There will be one extra strip so toss (or save in your scrap bin?) the one that has the ugliest top-stitching.

Edited-27

Now that the belt loops have been made, it is time to position them on the pants in preparation to sew the waistband.  We’ll do this by pinning them with the right side facing the right side of the pants (choose whichever side of the belt loop you had facing up on the sewing machine bed when you were top-stitching as your stitches will look nicer on this side).  Pin them with one raw edge of the belt loop lining up with the raw edge at the waist of the pants and the rest of the belt loop extending downwards.

Choose your placement based on the line diagram in the instruction booklet (or based on these photos here), or you could place the belt loops as per the wearer’s favorite pair of RTW pants.  You could even use the extra belt loop to form an ‘X’ shaped double belt loop at centre back if this is your preference.

Edited-28Edited-29

To keep the belt loops in place while stitching the waistband, we can simply baste along the top of each loop.

Edited-30

And now it is time to begin the waistband!  Place the waistband and pants with right sides together and match up any notches while pinning in place.

Edited-32

Make sure that the seam allowance extends out on either side of the fly, as pictured below:

Edited-33

Now, we can stitch the waistband to the pants.  There are a few things to watch out for while you do this:

  • Be very careful when you sew over the zipper – it is safest to use the hand crank on your sewing machine instead of the electric foot at this point so that you have time to shift the zipper teeth out of the way when you feel the needle hit them.  Either that or you can wear goggles as is done over at Cation Designs!
  • Ease as you sew and try to sew over your pins rather than taking them out so that nothing shifts around
  • Check your belt loops are lying straight and flat before sewing over them

Edited-34

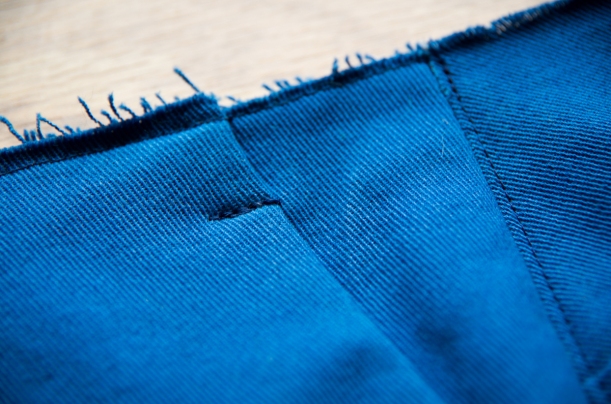
Once that is done, we must do quite a bit of grading – this area can get pretty bulky so trim the pants seam allowance and the belt loop seam allowance short and keep the waistband seam allowance long to eliminate this issue.Edited-35

Good!  Now, let’s apply the binding to the long raw edge of the waistband.  When test sewing, Meg of Made by Meg mentioned to me that she prefers to apply the binding to one of the waistband edges before she sews it on to the pants so she doesn’t have to deal with the bulk of the pants while completing this step.  Feel free to do this!  The only reason I sew it on afterwards is because I don’t find the bulk bothers me at all (maybe it’s because everything feels small and un-bulky compared to sewing massive duvet covers for my work with The Heather Company!).  Note that the raw edge of the binding is lined up with either end of the waistband – there is no need to tuck it under to create a finished edge as this will be tucked inside of the waistband later on.

Edited-36

Wow, don’t those insides look nice?!

Edited-37

Okay, so now comes the tricky part which we’ve THOROUGHLY documented with photos – I hope this helps anyone who has ever been a bit confused when finishing the corners of a waistband!  This is what our waistband looks like at the moment:

Edited-38

To begin sewing the corner, we have to fold the waistband in half with right sides together with the raw edges of the waistband (well, one raw edge and the other bound edge) lined up.

When you go to do this, you will notice that the entire bulk of the shorts/pants gets in the way.  Pull this bulk away from the short edge of the waistband so it is still sandwiched by the waistband but is out of the way when you go to stitch the short edge.  Here is a photo representation of how to do this:

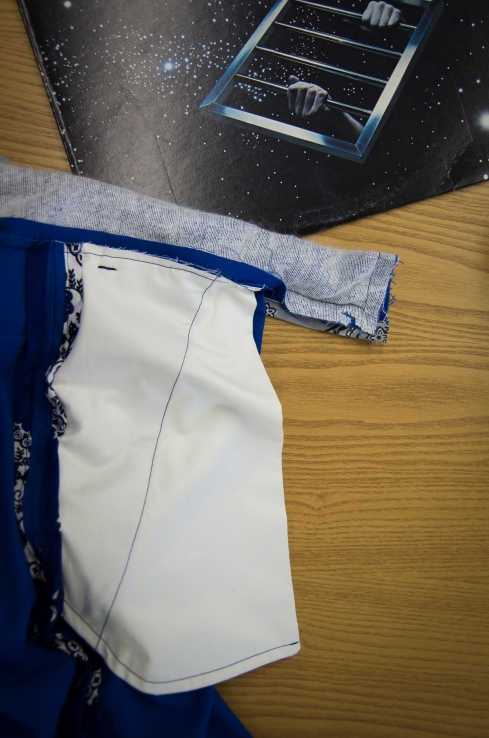
In the photo below, my left hand is holding the bound edge of the waistband and my right hand (the lower hand) is holding the raw edge of the waistband to which the rest of the pants are sewn.  The zipper/rest of the pants are visible in the middle.  I am beginning to fold the waistband in half with right sides together.

Edited-39

Here is what it will look like when it is properly folded in half:

Edited-40

And here is the bulk of the zipper and pants being sandwiched in between (and pushed away from the short edge of the waistband so it is out of the way).

Edited-41

Keep a firm grip on what you’ve done so it doesn’t become unfolded and place a few pins in if it will help you to keep things in place.  (The photo below is a good example of how far the rest of the pants have been pushed inside of the waistband, and then to the left, out of the way).

Edited-42

Now we are ready to stitch from the top, folded edge of the waistband to the stitching line where the shorts/pants are attached to one edge of the waistband…

Edited-43

…and then pivot and stitch (with the shorts/pants tucked out of the way inside the waistband) approximately 2″ along the already stitched line, this time catching both layers of the waistband.

Edited-44

This is what it will look like when you are done this stitching:

Edited-45

Now you can turn the waistband corner right sides out for a moment to check that everything looks square and properly stitched.  Turn it wrong sides out once again so we can grade this area closely – clip both corners and grade both seam allowances.  I like to start grading about 1/2″ from the end of my stitching so that when things are turned right side out there is a bit of extra binding on the waistband that will tuck into the sewn corner – you can see the extra binding in the photo below:

Edited-46

Once the waistband is turned right sides out, we must carefully poke out the corners (a knitting needle works well for this – try to avoid using the tips of your scissors…they’re handy but wouldn’t it be disastrous if you snipped a hole in your fabric after all this work?) and press everything flat.

Edited-47

Here is what the inside of my waistband looks like at this point (I’ve only sewn one waistband corner). You can see how the bound edge of the waistband tucks into the finished corner.

Edited-48

With that done, we can now secure the rest of the inner waistband to the pants.  First, pin from the inside so that the waistband is positioned as it will be when it is finished:Edited-49

Flip to the right side of the shorts/pants and edge stitch 1/8″ away from the bottom of the waistband, catching the inner waistband and sewing over your pins as you go.Edited-50

This is what it will look like from the inside:

Edited-52

Now it’s just a matter of finishing our belt loops!  While the belt loops are still pointed downwards, stitch across them, 3/8″ from the bottom edge of the waistband (this simply allows more room for a wide belt).  Fold the belt loop up from this point and fold the raw edge under as pictured below.  Fold them fairly loosely so there is still lots of room for a belt to be threaded through.  I’ve cut off a bit of excess from the end of the belt loop – how much you cut off will depend how loose you would like the belt loops to be.Edited-54

Stitch across the folded top of the belt loop several times (to make sure it’s extra strong) and, if you would like, trim the raw belt loop edge even shorter.Edited-55Edited-56

And that’s that!  All that you have to do now is add a button hole and button.  Start your button hole 1/2″ away from the edge of the waistband and sew it horizontally along the waistband.  Sew your button directly above the zipper on the other side of the waistband.  If you don’t really like sewing button holes (welcome to the club!) and the wearer always wears belts anyways, you could consider hand sewing a large hook and eye (not the tiny little versions meant for dresses, but the big, heavy duty flat ones that are more like clips) to the inside of the waistband.  I’ve seen this quite a bit on RTW shorts so I tried it out on Matt’s first version of the Jedediah Shorts and it worked really well!

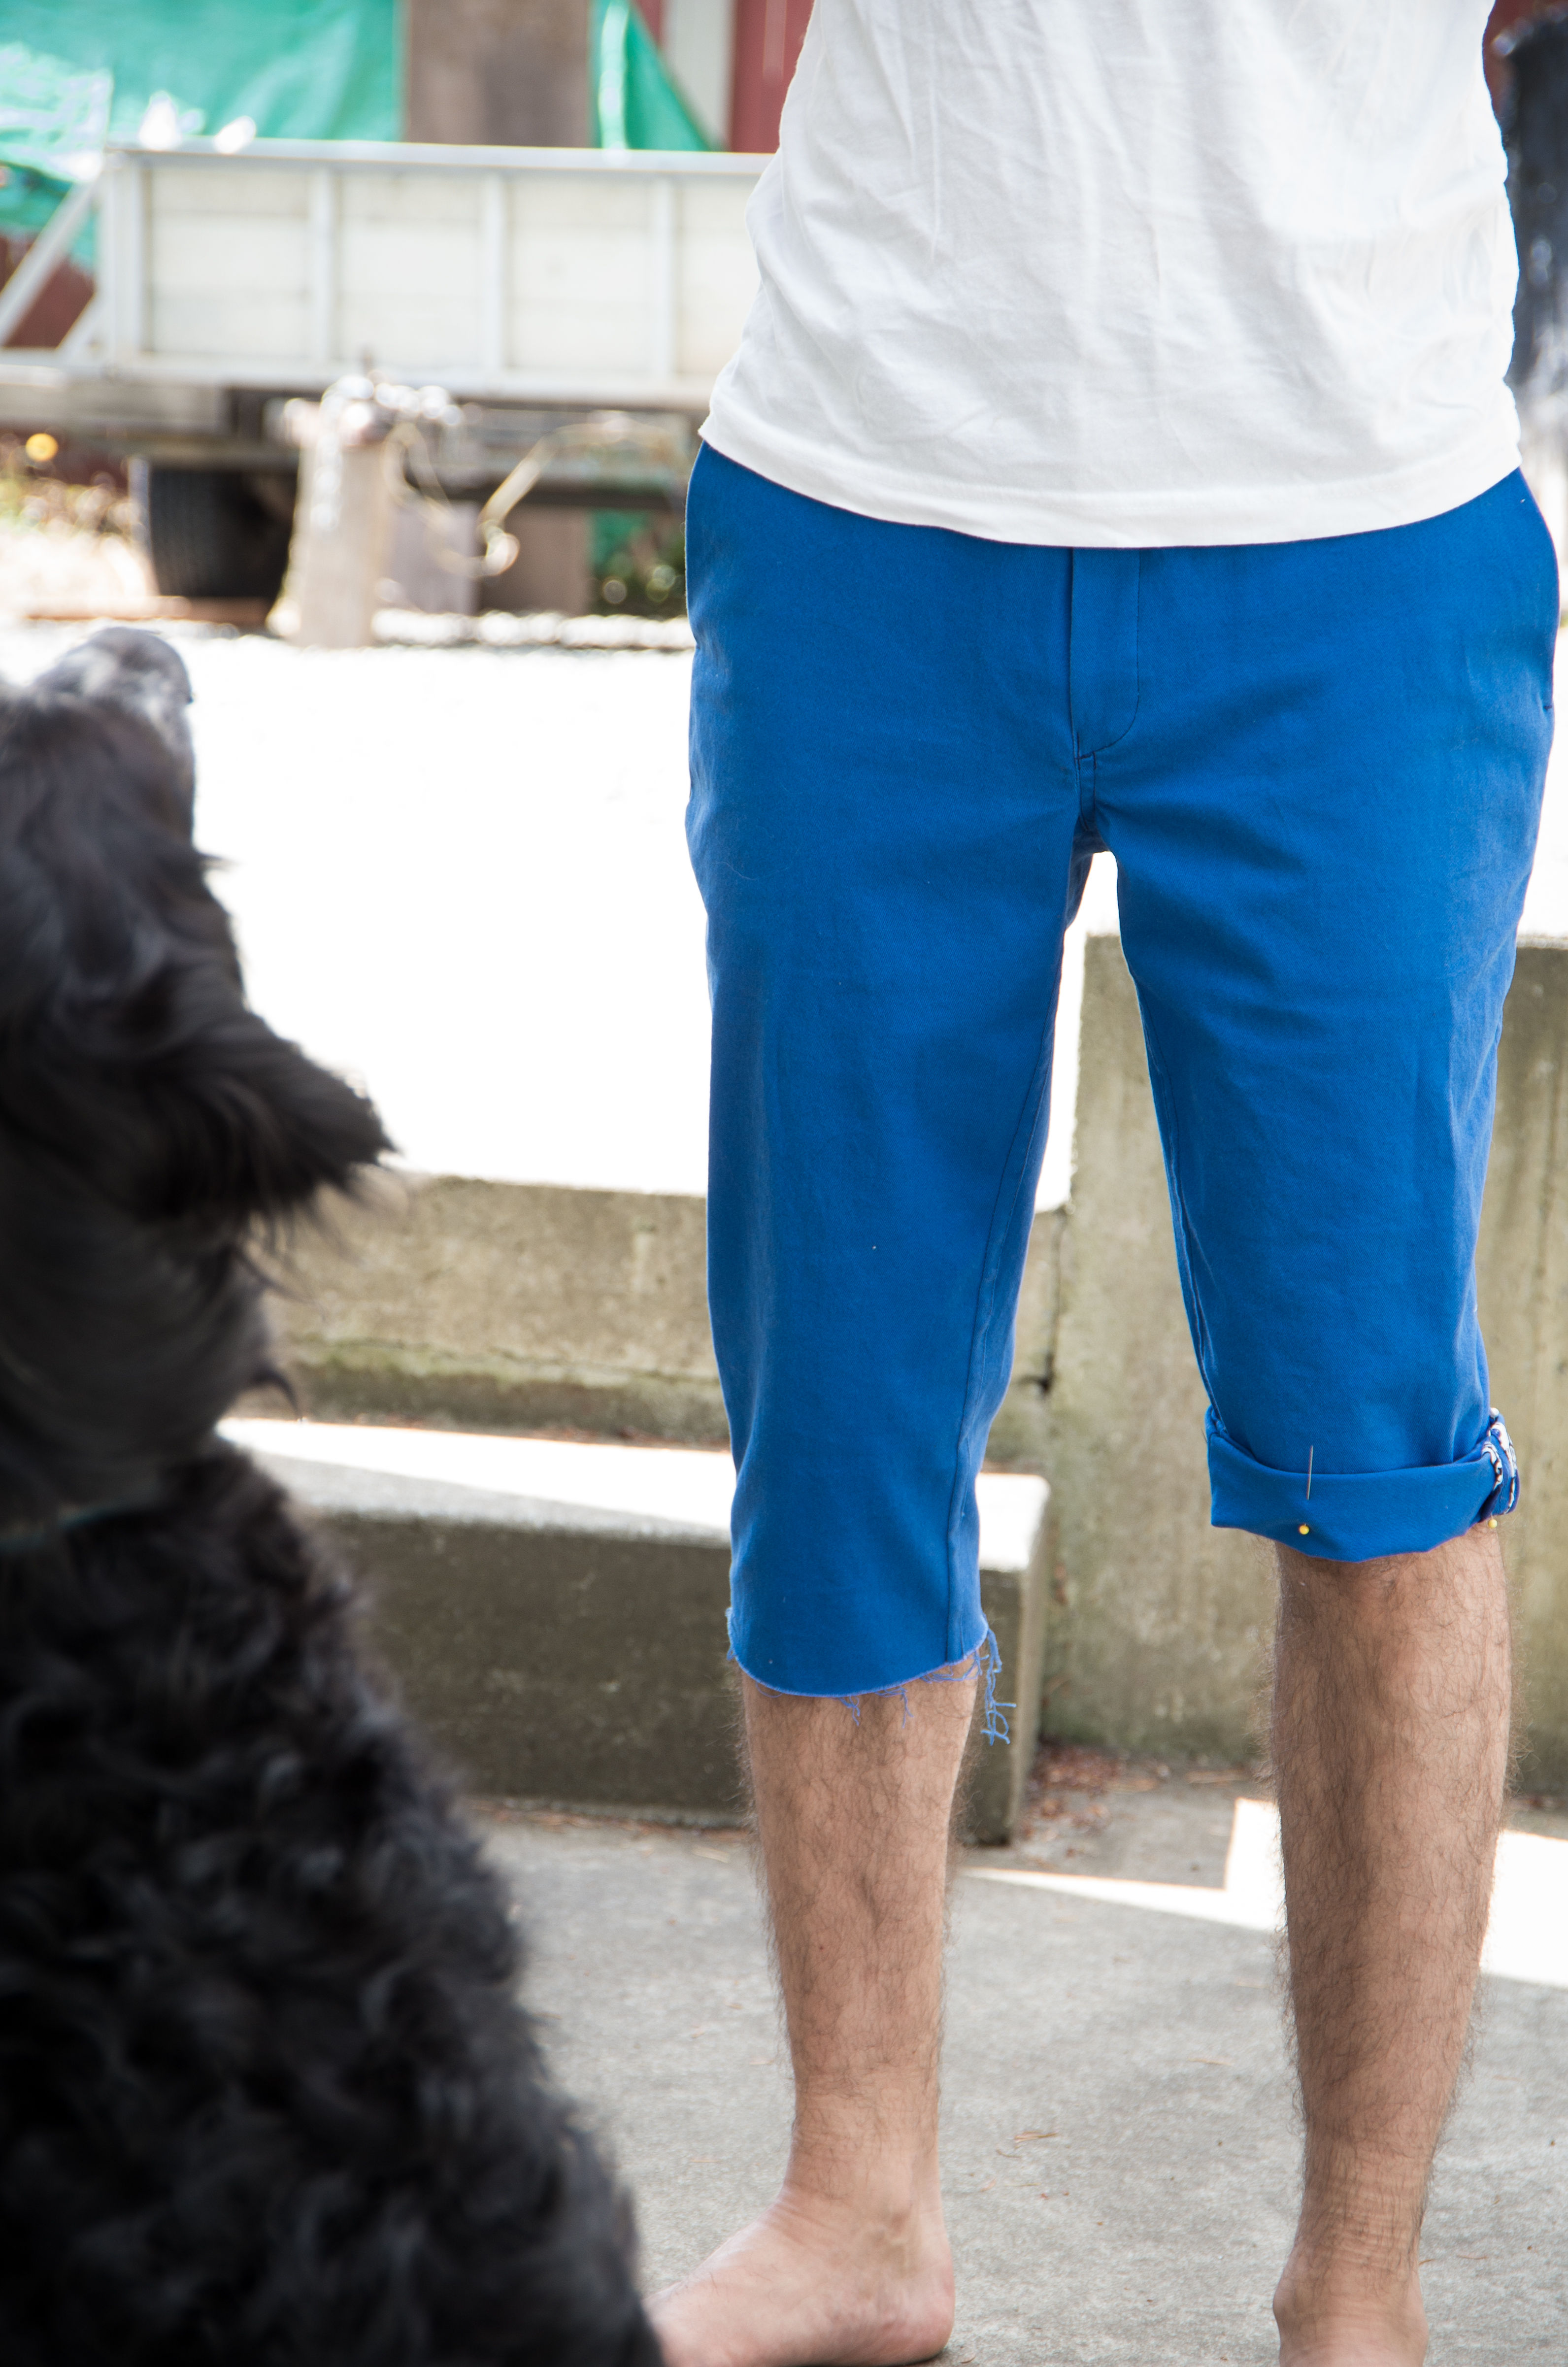
Tomorrow will be the home-run stretch during which we sew the hems and optional cuffs!  If you are sewing the pants variation rather than the shorts, you don’t need to wait for us…you’re probably too excited to finish them off to wait a whole day just to sew a simple 3/4″ hem!  For those of you doing cuffs – these are super easy cuffs that allow us to display all the hard work we put into seam finishes!  See you tomorrow!

Edited-57


2 Comments

Contest Alert!

Triptych

We’re thrilled to announce that Kollabora, the awesome social site for makers of all types, have collaborated with us to host a Jedediah Shorts and Pants sew-along photo contest!

They are graciously giving away a prize pack worth $25 to add to the Strathcona Henley pattern that we will be giving to the winner.  That’s right…you could win the Strathcona Henley pattern AND a bunch of amazing things from the Kollabora shop!

All you have to do to enter is upload a photo of your pants or shorts and accumulate the most ‘hearts’ by September 16th.  You can post some project shots now and update them as you get further along in the sewing process…that way you don’t have to wait until you are done the shorts or pants to start accumulating hearts.

Find out all the info over on the Kollabora blog!


34 Comments

Day 6 – Sewing the Fly (Jedediah Shorts Sew-Along)

Eeek!  Today is the big day!  We have been working away in secret for a couple weeks now in order to prepare for today’s post…and here it is: A You-Tube video on how to sew the fly!

We hope that you like it and find it more helpful than photos would be.  This is our first time (ever!) making a video so it is far from being professional quality (we have already learned so much that we want to do differently on the next one).  And, since I’m really shy, I just have to say – please excuse my nervous awkwardness in front of the camera…it was terrifying!

If anyone would prefer a photo tutorial to the video, let us know in the comments and we will take stills from the video and turn them into a traditional photo post on how to sew the fly.

Good luck with your sewing today!  Just pause the video whenever you reach a tricky point and re-watch.  It goes a little fast compared to the real life sewing process as we cut out anything repetitive but we were careful to include a video for every sewing step so you can follow along using the written instructions.


8 Comments

Day 5 – Sewing the Inseams (Jedediah Shorts Sew-along)

Edited-18

Has everyone had a chance to catch up since Sunday?  I hope so, because today, with our cup of milky Lady Earl Grey and a little Otis Redding, we’ll be sewing our flat fell inseams.  It’ll be a nice, easy, and short day since we’ve already perfected our flat fell seams on the back yoke!

First, I’ve started by pinning the inseams together with the WRONG sides together.

Edited-20

Edited-19

I sewed this seam at 5/8″ (you may need to ease a little bit as you sew so that the hem ends up even) and then carefully trimmed the seam on the Pants Back to 1/4″.  Don’t catch the other half of the seam (the one belonging to the Pants Front) when you are trimming!

Edited-22

I’ve pressed the seam open (this will ensure your flat fell seam is crisp and even when it is done).

Edited-24

Next, I’ve pressed the seam entirely to one side (with the narrow seam allowance laying on top).

Edited-25

And here comes the fiddly bit: I’ve folded the wide seam allowance in towards the narrow seam allowance so that the two raw edges meet in the middle.  To do this I press as I go…keeping my fingers folding the seam allowances with one hand and following along with the iron with the other hand.

Edited-26

I’ve then flipped this pressed seam allowance package over to the other side of the seam so that all the raw edges are enclosed and then I’ve pinned in place  (use lots of pins so your careful pressing doesn’t become a bit wonky!)

Edited-27

Now I’ve sewn 1/8″ away from the loose edge, permanently enclosing the raw edges and creating a lovely (and strong!) flat fell seam.  Sewing along the pant legs is a bit tricky because they form a narrow tube (though it’s easier with shorts than pants!) but believe me, it’s possible…and you can do it if you take it slow and steady!

Edited-28

Edited-29

And just like that, we’ve sewn our RTW worthy flat fell inseams and our shorts are beginning to look like shorts!  Now that you’re in the groove of things this week, we are ready to tackle the fly tomorrow!  Stay tuned because we have worked SUPER hard on this next post and think it will fully demystify the previously oft-dreaded fly sewing process.  I can’t wait to show you what we’ve done!

Edited-31


7 Comments

Day 4 – Sewing the Side Seams (Jedediah Shorts Sew-Along)

Edited-2 This Sunday evening a glass of wine and some good ol’ Bill Cosby will accompany us while we sew our side seams.  This is my favorite of Cosby’s records and I just found  the entire thing, well recorded, as a play list on YouTube for you to listen to!  Woot woot! (My record is getting pretty scratchy so the YouTube version actually sounds much better).

Have your shorts or pants been coming along well so far?  Have you been able to keep up with the sewing or are you reading along so you’re ready to sew after the sew along is finished? I hope you are finding the photos and instructions clear!  If you are confused with any of the steps so far, just leave a comment and I will do my best to elaborate on them :).

Now, lets get ready to sew our side seams – a pretty easy and satisfying set of steps!  First of all, we’ll pin our Pant Fronts to our Pant Backs with right sides together along the side seam (the edge with the gradual curve). Edited-1 Then we can sew and press open the entire seam. Edited-3 Do you have your binding ready?  If not, here is my post on making binding from a vintage handkerchief to help you out, or you can simply use the store bought variation.  You’d be surprised how little fabric it takes to make a good sized piece of binding so you could always root through your scraps and use any 10″X10″ piece of thin woven material (make it easy on yourself and choose something that maintains a crease well!).  If you make extra wide binding like I did, then you will need four 10″X10″ squares worth of binding for the side seams (leaving you with a few extra small pieces that you could use later on for the zipper shield). Edited-4 Now we will pin the binding to one of the side seams (you can start with either the front or the back).  Place the narrower edge of the binding on the side you will sew so that the wider edge extends under, sandwiching the seam allowance and reaching farther towards the stitching than the narrower top piece.  This will give you a bit of lee-way when you sew to ensure that you catch the bottom layer of the binding. Edited-5 Edited-6 We can now sew the first edge of the selvage and repeat this process for the second edge (and also for the second leg.  Ta-da, beautifully bound seams!  Won’t these look impressive and colourful when the wearer is putting on his shorts? Edited-8 Edited-9 After admiring our bound seams for a while (and giving them a final press to flatten out the binding), we can take a few steps to strengthen the front pocket area. You can sort of see the finished side seam and the strengthening stitches below but we will zoom in for a closer look in a second. Edited-10 The strengthening stitches include a bar tack near the top and at the bottom of each front pocket as well as edge stitching down the side seam until 1″ below the pocket: Edited-11 Edited-12 To make the bar tacks, you can either use a very tight zig-zag (like a button hole stitch), or do what I did here and stitch for 3/8″ using a straight stitch and then reverse and stitch again…and again…and again.   I’ve placed my bar tacks 5/8″ from the waist at the top of the pocket and just below where the bottom of the pocket meets the side seam.  That way the pocket won’t split open or bag out when it is constantly under pressure from being filled with hands and change and keys. Edited-14Edited-13 I have edge-stitched, catching the back seam allowance, 1/8″ from the side seam along the back of the pants until 1″ below the pocket.  I then back-tacked for a long ways and reversed and sewed several times to echo the look of the pocket bar tacks. Edited-15 There!  That wasn’t so bad!  Now, I wonder if you will be tempted to bind EVERYTHING the way I am?  It’s so simple and yet so effective (and a great way to use up scraps!).  Do you like to make your own binding or do you tend to use store bought?  Have you ever used one of those neat little binding tools that fold the fabric for you as you iron?  I’ve never had a chance to try one but, since my binding never seems to turn out completely uniform, I certainly am intrigued.  See you next Thursday when we sew the inseams! Edited-17


11 Comments

Guest Posts: Katie’s Back Pockets

Today we have another guest post treat – this time from Katie, the author of the blog, The Creative Counselor.  She is the test sewer who made this version of the Jedediah Pants.  She used a gorgeous recycled hemp and organic cotton blend and widened the legs to create a totally different style of pants than our slim fit originals – I love how well these pants display the versatility of a well fitting pants pattern – all you have to do is adjust the width or length of the legs to create endless varieties and styles!

Kathryn of The Creative Counselor's recycled hemp and organic cotton pants.  She has altered the leg width to create boot-cut pants!

Kathryn of The Creative Counselor’s recycled hemp and organic cotton pants. She has altered the leg width to create boot-cut pants!

Here is what Katie has prepared for us – super strong pockets with absolutely no raw edges – I love it!:

Hello Thread Theory readers!  I’m Katie and I blog about my sewing and crafty creations over at the Creative Counselor.

I was one of the lucky three ladies who got to be pattern testers for the Jedediah Pants, and got my greedy little hands on the pattern before the rest of the world.  I know you will all soon come to love this pattern as much as I do, if you don’t already!

One of my favorite things about the Jedediah pattern is the beautiful seam finishes that Morgan has included throughout the pattern.  When starting my pants, I told my husband that this would likely be the only pair of pants that he owned with actual flat-felled and bound seams on every single seam.  And I was right!

While constructing my Jedediah Pants, I decided that I wanted the back pockets to have a similarly beautiful finish that enclosed all of the raw edges.  With that in mind, I examined some of our nicer RTW jeans and puzzled out how to finish the back patch pockets so that all of the raw edges were enclosed and the whole pocket looked neat and tidy.

If you’d like to include a similar finish on your back pockets, here’s how you can do it:

1.  Attach bias binding to the top edge of your back pocket piece, following the instructions included in the pattern.  Alternatively, if you don’t want to bind the top edge of the back pocket piece, you can serge or sew a zig zag on this edge, or turn the top edge down ¼” (wrong sides together) and press.  Personally, I like the bound edge here — those small hidden details make a pair of handmade pants special and truly unique.

Jedediah Photo 1

2.  Fold the top pocket edge along the marked fold line right sides together.  Do not press this edge at this point.  Pin it down and stitch the fold down vertically ⅝” in from each side (also per the pattern instructions).

Jedediah Photo 2

3.  Here, the pattern instructions will tell you to trim your seam allowance to ¼”, meaning that you will trim off about ⅜”.  Do trim your seam allowance to ¼” but rather than stopping where your stitching stopped, trim off that ⅜” all the way around your pocket piece.

Jedediah Photo 3

4.  Flip your top edge over so that the wrong sides are now together, and use a point turner  or a chopstick to push out the corners, making them nice and pointy.  Press the top edge of your pocket.

5.  Carefully fold in the other edges of your pocket piece (remember, your allowance has now been reduced to ¼”) and press them.  Be very deliberate here so that all edges are crisp and the point at the bottom is nice and clean-looking.

Jedediah Photo 4

6.  Stitch down the folded top edge of your pocket.

Jedediah Photo 5

7.  Position the pocket on the back pants/shorts piece and pin in place.

Jedediah Photo 6

8.  Topstitch the pocket down using a ⅜” allowance.

Jedediah Photo 7

Jedediah Photo 8

9.  Once the pocket is attached to the shorts, you’re going to sew a second parallel line of stitching by edgestitching around the very edge of the pocket piece.  This ensures that the raw edges of your fabric are neatly enclosed between these two seams.

Jedediah Photo 9

You could, of course, do this edgestitching first, but I find that it is far easier to control the stitching and get a really nice-looking edge stitch if the pocket is already secured with the inner row of stitching.

Jedediah Photo 10

10.  Strengthen the top edge of the pocket either by stitching triangles in each top corner, or by placing a bar tack in each corner.

Jedediah Photo 11

Jedediah Photo 12

You’re done, and ready to continue on with your shorts!  Take a moment to sit back and admire the prettily-finished back pockets.

Thanks so much for having me Morgan!  I can’t wait to see everyone’s finished shorts!


Leave a comment

Day 3 – Sewing the Back Pockets and Yoke (Jedediah Shorts Sew-Along)

Edited-19 Today’s a big day (we’re sewing both the back patch pockets on and the yoke) so we’ve got some blueberry and lavender water and a snack to keep us going as well as Bob Dylan’s “Blonde on Blonde” to sing along to as we work.  Don’t worry, none of this process is too difficult – we’ll take it step by step!

http://www.youtube.com/watch?v=nMq-8ObJhZg

Katie of The Creative Counselor, the skilled sewist who created this version of the Jedediah Pants, has kindly shared with us an alternative way of sewing the back patch pockets which results in absolutely no raw edges and a very strong pocket – both things that I want in a pocket, that’s for sure!  To see her guest post explaining how to use the Jedediah Pants patch pocket to do this, click here.

To create the version I’ve included in the Jedediah Pants instructions, simply follow along here!  With our stitching templates handy, we will first transfer the pocket stitching design.

Edited-17 We’ll do this by placing layering both pockets together (wrong sides together) and putting the template on top.   Choose one of the mountain-shaped stitch lines (I picked the highest) and place pins at the highest and lowest points of the line. Edited-18 Now flip over the three layers and place pins in through the other direction exactly where the first three pins extend from.  Pull off the stitch template and replace the three pins you pulled off with it. Edited-20 Pull apart the two pocket pieces, leaving a set of pins in each piece.  On the right side of each pocket, I’ve transferred the top highest stitching line using chalk and a ruler to ‘connect the dots’ between each pin.Edited-21 Edited-22

With only the top stitching line transferred, I like to sew along this line and then use the markings on my sewing machine bed to measure the distance to the next line.  You could simply mark the next two lines with chalk as well but I find it is trickier to make really straight topstitching when I am trying to follow a line instead of watching the measurement on my sewing machine and it’s relation to the presser foot.  You choose!  Either way, each stitching line is about 3/8″ apart.

Edited-23

After creating the decorative top-stitching, we are ready to start sewing the pocket.  To begin this process, I’ve used two scraps of binding to finish the top edge of the pocket.  I’ve placed the wider side of the binding on the bottom and the narrower side on the top and then sandwiched the pocket piece in-between the two.  I’ve stitched, catching all three layers.

Edited-24

To create the top corners of the pocket, we must fold along the notched fold line so that right sides are together and then stitch, using a 5/8″ seam allowance from the folded edge down to the edge of the binding.  Next, I’ve trimmed along this stitched line so that the seam allowance is 1/4″ wide:

Edited-25

Once both pocket corners are trimmed, turn out the corners using something pointy (a knitting needle is good for this!)  and press under the rest of the pocket edges at 5/8″ seam allowance to match the edge created by the sewn corners.  Once done, you will have something that resembles a pocket front!

Edited-26 Edited-27

All that we have to do to finish the back patch pockets is stitch along the top edge of the pockets, 1/2″ from the top and then place them on the pant Back pieces.  Here is how I ensure that the pockets are level and in the correct place (nothing worse than lopsided back pockets!):  First I pin them on using the markings that we made when we cut out the fabric to line things up.

Edited-28

Here is a closer look:

Edited-29

Then I lay the the pant Backs with right sides together and fold back the fabric to see if the pockets are sitting directly on top of each other.  If they aren’t, I adjust the pins and check again.

Edited-30

Once accurately pinned, we can top-stitch the pocket in place.  I like to create a triangle of stitching at the top corner of each pocket for added strength.  I do this by beginning stitching 1/2″ from the top of the pocket, stitching on an angle to the top of the pocket, over to the edge of the pocket (1/4″ away) and then down the side, continuing to the other top corner and reversing the triangle process.  Here is a close up so you can better understand what I’m talking about (ignore the yoke above the pocket, we’re doing that next!):

Edited-41

Phew!  We’re done the patch pockets!  Take a breather and then we’re on to the flat-felled back yoke (I told you it was a bit of a long day!).

Edited-31

I’ve started the back yoke by pinning the Yoke piece to the top edge of the pants Back with WRONG sides together.  The widest part of the yoke is towards the center of the pants (where the sharply curved seat seam is).

Edited-33

Now, lets stitch this seam at 5/8″ and then grade the pant seam to 1/4″.  Be quite precise in this grading as it makes the next steps easier…and be sure to leave the yoke seam at a full 5/8″!

Edited-35

Next, we press the seam open – this will help to create a crisp and straight flat fell seam.

Edited-36

Now, we press the seam towards the yoke:

Edited-37

And then we fold the 5/8″ seam down so that the raw edge meets the raw edge of the 1/4″ seam in the centre.  This is a bit fiddly – careful not to burn your fingers!

Edited-38

Next, we flip the whole package over so the seam allowance is sitting on top of the pants Back (not on the yoke) and the raw edges are hidden.  I’ve pinned it carefully in place so my ironing doesn’t get uncreased as I move the pants to the sewing machine.

Edited-39

Lastly, we edge stitch along the folded edge to create the flat fell seam – doesn’t it look nice?  And it’s super strong!

Edited-40

The back pockets are done, the yoke is done and our snacks are done…and tomorrow is an easier day during which we sew the side seams!

Edited-42


10 Comments

Day 2 – Sewing the Slash Pockets (Jedediah Shorts Sew-along)

Now that our fabric is all cut out, today we will be sewing the first step – the slash front pockets!  Today I’ve got a massive glass of cucumber water to keep me hydrated while I stand over the steamy ironing board and The Best of Van Morrison playing away in the back ground.  Here’s my fave (my mom’s song!):

To sew the slash front pockets, first of all, we need to attach the two separate facing pieces to each pocket lining.  Pocket Facing #1 will become the visible front of the pant when the pocket is complete and Pocket Facing #2 will be the inside edge of the actual pocket so that a person viewing the pants from behind won’t see the pocket lining fabric poking out.

I’ve prepared the facings by ironing the seam allowance (5/8″) under to make a finished edge.  Do this to the straight edge of Pocket Facing #1 (the large piece) and the longest edge of Pocket Facing #2 (the small piece).

Edited-2

To attach the facings to the pocket lining, I laid the pocket lining right side up and pinned the pocket facings to it (also with right sides up).  I lined up  the raw edges with the raw edges of the lining and pinned it all in place.

Edited-3

I’ve basted along the raw edges (within the 5/8″ seam allowance) and edge stitched along the folded edge of the facings.

Edited-4

Now it’s time to attach the pockets to the front of the pants! To do this, I’ve placed the Pant Fronts right sides up and the pocket lining right side down.  I’ve pinned and sewn along the angled edge (that will form the edge of the pocket).

Edited-5

Here is a close up of the angled edge.  All the other stitching you can see in this photo is the basting and edge stitching that was used to attache the facings.  The stitching we just did is along the left hand side of the photo.  I’ve graded the pocket seam to make it less bulky in the end, but if you prefer, you could serge this seam or even bind it so that you have no raw edges when you’ve finished your pants.

Edited-6

Now that our pocket seams are graded or otherwise finished, we will under-stitch along this seam so that the pocket linings and facings don’t roll to the outside when the pants are being worn.  To do this, I’ve stitched through the pocket lining/facings and both seam allowances but NOT the pants front.  I’ve lifted up the pocket lining/facing in the photo below so that you can see the seam allowances hiding underneath…but in real life, of course, I would stitch close to the seam with all of the fabric flat on the bed of the sewing machine.

Edited-7

Like so 🙂

Edited-8

And another view of me under-stitching (this term used to mystify me when I was a novice sewist so I’m being extra thorough so that anyone who’s found themselves confused by written instructions explaining under-stitching need no longer be confused!):

Edited-9

Once we’ve finished under-stitching we can press the pocket seam with right sides together.

Edited-10

And this is how the finished, under-stitched pocket edge will look from the inside:

Edited-11

After a quick water break…

Edited-12

We are ready to finish the bottom edge of the pocket by sewing a french seam.  I’ve gotten my bearings before starting the process by folding the pocket lining with right sides together along the notched fold line.  When folded, Pocket Facing #1 lines up with the side seam as you can see from both the right side and the wrong side in the photo below:

Edited-13

Next I’ve flipped the pocket lining in the opposite direction along the crease I just made and folded the pocket lining with wrong sides together.  In that position, the bottom of the pocket lining (the bottom edge in the photo below that includes both the pocket lining and the bottom of Pocket Facing #1) is ready to be pinned and then sewn using a 1/2″ seam allowance (visible on the left in the photo below).  The pocket pictured on the right in the photo below is attempting to show you the next step:  I’ve trimmed this 1/2″ seam allowance to 1/8″…super tiny!

Edited-14

Now I’ve turned my pocket right side out so that right sides are together and I’ve pressed it all flat.  Then I’ve enclosed the raw 1/8″ seam allowance by stitching along this edge again, this time using a 1/4″ seam allowance.  And the french seam is done!

Edited-15

The french seamed slash pocket is complete!  Sewing day #1…check!  If you have any questions, just leave a comment and we can all work together to help each other out 🙂

Edited-16


2 Comments

Guest Sew-Along Post: How to Save Fabric When Cutting Out the Jedediah Pants

Meg, of Made By Meg was one of the test sewers for our Jedediah Pants pattern.  She was the sewer who produced this spectacular pair of denim pants (with musical themed pocket linings!):

meg4

Not only is she a thorough and enthusiastic test sewer for us, she has also agreed to write a guest blog post to show you how she improved upon our cutting layouts…and saved a bunch of fabric!  Thank you, Meg, for taking the time to do this!  Without further ado, here is Meg’s very helpful tutorial to save you fabric when cutting out your pants or shorts for the sew-along!:

It’s no secret that I don’t always follow the rules, and this holds true for the Jedediah Pants
Testing the pattern for the fabulous Thread Theory, I made sure to follow most of the instructions: I carefully flat felled my seams, cut with the grain, and even followed the exquisite directions to french seam the pockets – and I was glad I did! But there was one area where I differed from protocol: the cutting layout. When I got the A-OK from Thread Theory, I figured I’d share it with you! So, here is an alternate suggestion for a cutting layout:

A bit of background: While it is usually wise to follow pattern instructions (ask me how I know!), cutting layout is one area where you can sometimes take a bit of liberty. For one, manufacturers often have to do a one-size-fits-all approach to the cutting layout, and your smaller or larger pattern pieces may work in a few different ways than suggested. On the user side, you may have to make adjustments for different fabric widths, a directional print, or even need to make do with just barely enough fabric. This is where it may be a good idea to experiment with a few different layouts before cutting.

The Jedediah layout: For the Jedediah Pants, the cutting layout places one pant leg above the other, with the waistband running vertically next to the pant leg (illustration below). While this works great to make sure that the pattern pieces in any size will fit on your fabric, it takes up a lot of yardage (3 yards at least)! Furthermore, if your fabric has a one-way print such as pinstripes, a one-way print such as a plaid, or even a 2-way stretch, a vertically cut waistband will not face the same way as the rest of your pants.

Cutting Layout

The modifications: To save fabric and make sure my waistband stretched in the same direction as the rest of the pants (I used a fabric with 5-10% stretch), I rearranged my pattern pieces, squeezing them on to under 2 yards of fabric! Here’s what the new layout looks like, based on how I cut K’s pants (left) and what that line drawing might look like (right):

LayoutMod

In order to make the waistband modification, I cut the the waistband along the fold of the fabric. As shown above (bottom right-hand corner), half the waistband is placed along the folded edge of the fabric. When the fabric is cut and unfolded, you’ll have a full-size waistband facing the same direction as the rest of your pants! Now my waistband will better match the rest of the pants.

You might call me a slacker, but I just love little sewing shortcuts that save me some fabric space!

meg2