
Happy New Year! I’m getting right in to the swing of things on the blog today now that the busy holiday season is over. It’s finally time for the Lazo Fitting post! Sorry for the delay on this one. I just couldn’t fit it in before my Christmas break.

I have included fit adjustments based on the feedback you gave me several blog posts ago. If I missed a category or you didn’t have a chance to request a fit adjustment, shoot me a comment on this post so that I can try my best to provide you with some fitting help.
I have chosen the simplest solution for each fit problem so I hope this post won’t intimidate you! Also, you will notice that a lot of my solutions use the Lazo’s unique style lines to help fit. We will work with the waistband shape and also with the pleats to create a better fit when possible instead of performing more elaborate pattern manipulation.
Now, please, before we get started, please add a mock up (trial run) of the Lazo Trousers to your agenda! All of these fitting suggestions are operating under the assumption that you have sewn a mock up using the size that best matches your hip circumference and a fabric that is fairly similar to the actual fabric you plan to use for your Lazos. Once the mock up is sewn, you will be able to see how the Lazos fit you and you can pin them tighter where needed or cut them open where needed to get an idea of where you need to adjust the actual pattern pieces. If you want to see this process in action, check out the photos that I took of Matt in his Fairfield Button-up mock up…he looked like Frankenstein but it was a great visual way to see where adjustments were needed!
Wide Hips
When choosing your Lazo Trousers size, I would recommend picking the size that matches your hip measurement most closely. If your hips are proportionately wider than our fit model’s hip measurement, you will likely need to adjust the fit of your trousers at the waist.
Here is an example: Your hip circumference is 42 7/8″ so you choose to work with size 14. Your waist measurement is only 29 7/8″ (which, is a size 10 for our Lazo Trousers). Select the size 14 pattern and then adjust it to suit your other body measurements.
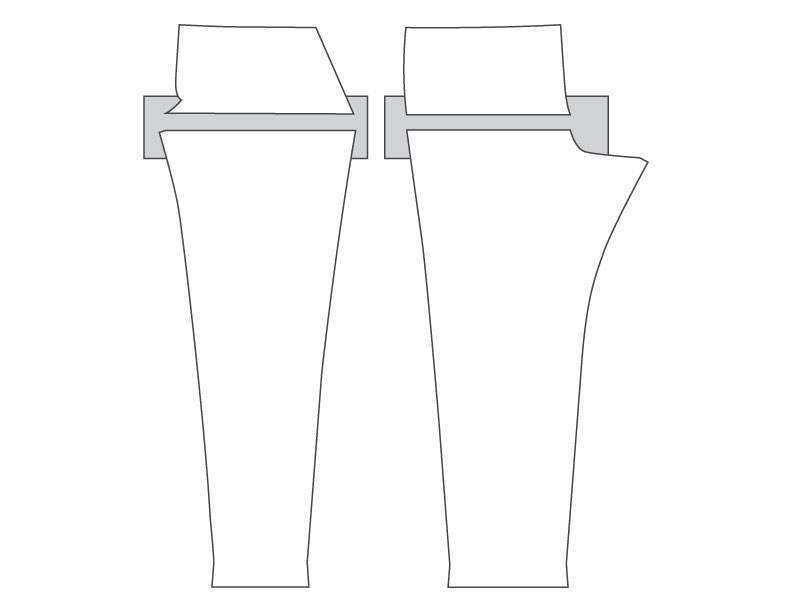
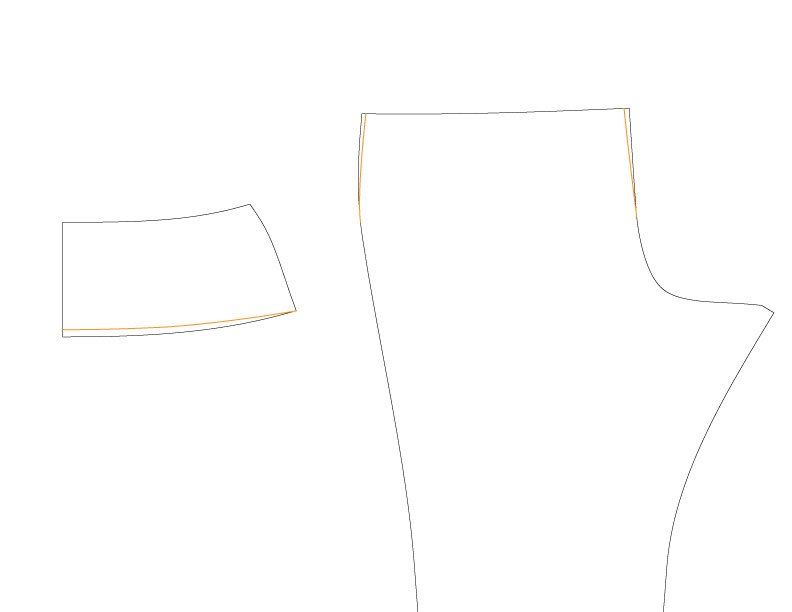
To bring the waist in to match your proportions, you can grade between sizes only on the waistband pieces. The fullest part of the hip curve is positioned at the bottom edge of the waistband so you will need the bottom edge to remain the larger size to match your hips. This makes it very easy to work with two sizes because you don’t need to worry about adjusting the pocket pieces!

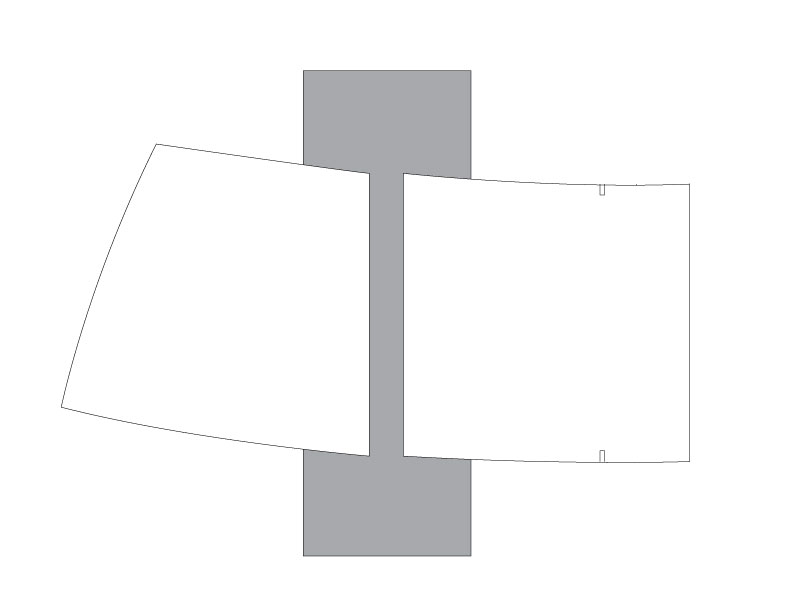
Of course, your wide hips might sit higher or lower than the Lazo Trousers hip curve. I would recommend making a mock up after grading between sizes. Try on the mock up to see if there is any strain or bagging along the curve of the hips. Adjust the shape of the curve accordingly. Note that you will need to adjust the pocket facing and pocket to match your new curve. I find it is easiest to do this by lining up the pieces how they will be sewn together (as I have done with the pocket facing in the image below), that way you can copy the hip curve on to the smaller pieces:

It is remarkably common to have two different shaped hips – you will notice that your mock up pulls on just one side of the body. This is because we generally have a dominant leg that gets used more often – it develops more muscles and becomes bigger. During the pant fitting class that I took a couple of summers ago, my classmates and I were surprised to find that the majority of us needed to adjust for a hip that was higher or larger than the other hip. For most of us, it was our right hip. To make the pants look symmetrical on an asymmetrical body, you can adjust one hip but not the other. I don’t think I would do this unless the larger hip was very noticeably causing asymmetrical strain lines.
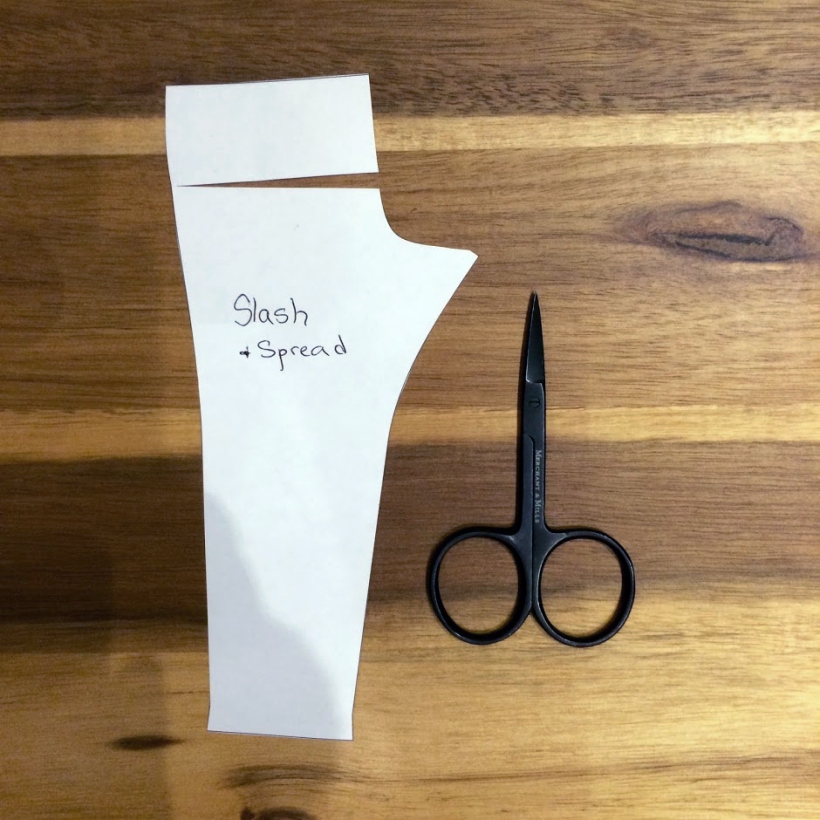
Crotch Depth is Too Long
As I mention within the instruction booklet, the Lazo Trousers feature a very closely fitted seat seam. This creates a flattering, fitted appearance to balance out the roomy double pleats. It is very likely that the crotch depth of our fit model will not match your crotch depth exactly. Don’t ignore this because you may end up with uncomfortably tight trousers that try to give you a wedgie!
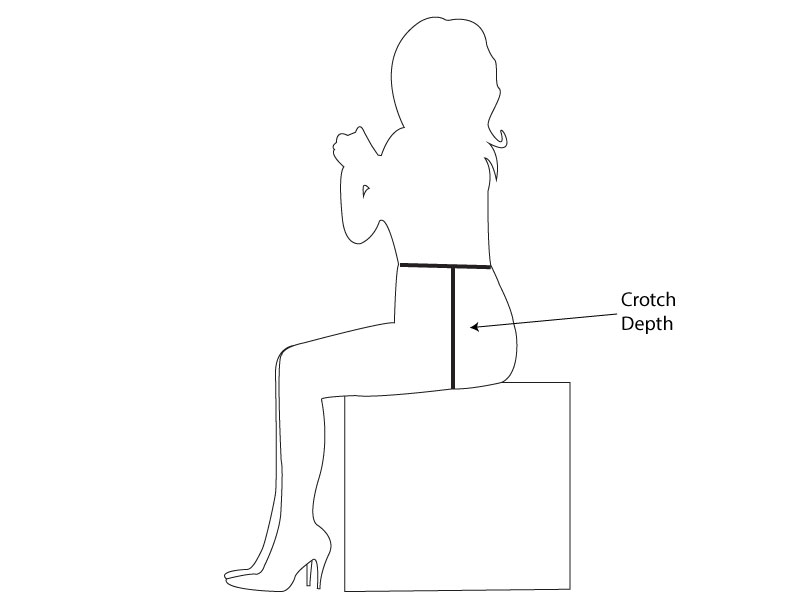
Measure your crotch depth as I illustrate in the booklet and then slash across your pattern pieces and spread them apart. Adding crotch depth will ‘drop’ the crotch – a little adjustment goes a long way! I recommend adjusting slightly less than you think you need in order to maintain the very fitted appearance of this seam.
It is important to adjust the crotch depth before adjusting for a full tummy, flat tummy, full bottom or flat bottom. Changing the crotch depth will change all other pressure points because the pants will sit lower on the body (the crotch length is increased). Make up a mock up before proceeding to the other fitting issues – you may find that they no longer exist!
Full Tummy
This is a very important adjustment for the Lazo Trousers because the contoured waistband fits snugly and the bottom of the waistband will likely sit against the fullest part of the tummy – you do not want this to be cutting in to you! You want it to match the width and curve of your body.
If you are unsure whether you require a full tummy adjustment, circle a measuring tape around your waist (the narrowest point). If you have a full tummy you will find that the measuring tape naturally wants to ride up at centre front and sit lower at centre back. This is okay, of course! Let the measuring tape do this when you measure your waist…just know that you will need to add more length to the front of your trousers so they have room to curve over your tummy.
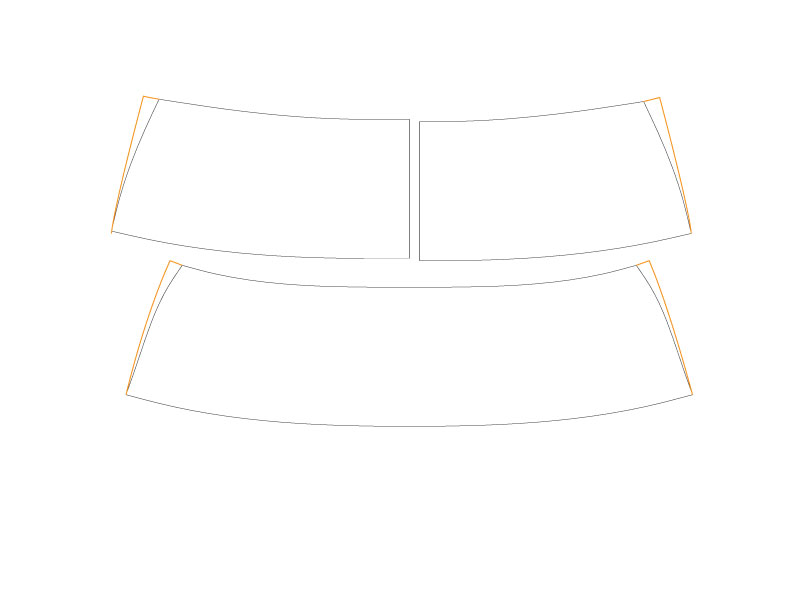
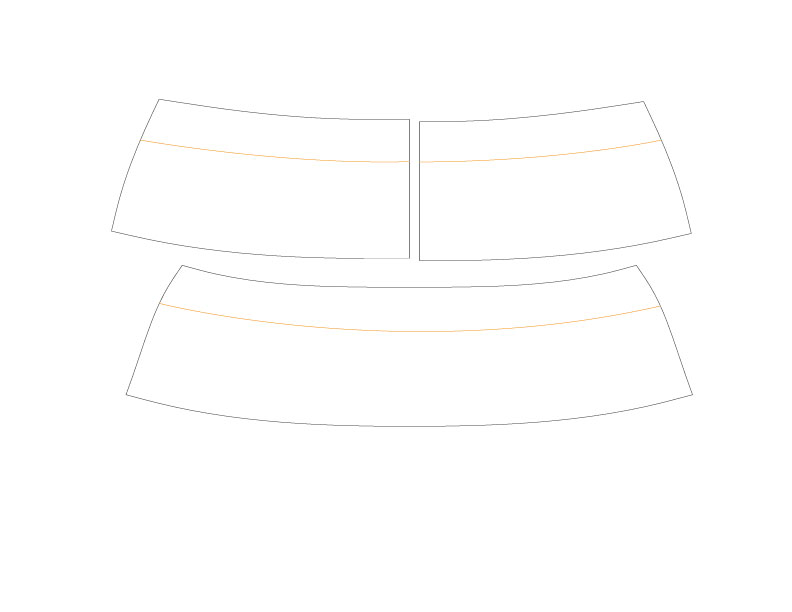
Here is my preferred way to add a combination of length and width to accommodate a rounded stomach. You will need to adjust the Waistband Front and the trousers Front.

Cut your pattern piece vertically down to the knee. Turn your scissors 90 degrees and cut across the knee leaving a hinge at the side seam and the inseam. Cut horizontally at the hip as well (at the bottom of the slash pocket). Spread open to add as much width at the waist as needed. Add the same amount of width to the waistband.
If you wish to avoid any fancy pattern manipulation, a very simple way to add some width to the Lazo Trousers front could be simply letting out one (or both) of the pleats! You would need to add width to the waistband accordingly. If you only sew one pleat on each pant leg, you would add 3/4″ to the waistband (for an extra 1 1/2″ overall). If you do not sew any of the pleats you would need to add 1 1/2″ to the waistband (for an extra 3″ overall…a very large adjustment!).
If you do not need the extra width at the top of the waistband because you have a narrow waist, you could add width in a wedge shape instead of spreading them apart evenly. The wedge would tapers to less or nothing at the top of the waistband.
Flat Bottom
There are no darts on the Lazo Trousers since the shaping needed for the curve of your bottom is built in to the waistband seam. If you have a flat bottom you will likely notice two fit issues when you sew a mock up:
- The waistband appears to be wrinkled and sagging because it provides too much room for your bottom.
- There are folds of fabric below your bottom at the back of your legs – this is because the back of the pants are too long since they do not have to curve over a round bottom.
These two issues mean that the trousers do not need as much width or length to curve across your bottom horizontally or vertically.
Try adjusting the curve of the waistband. I show you how to adjust the curve in the instruction booklet to suit a full bottom in the last illustration within the “Fitting the Waistband” section. The adjustment needed for a flat bottom is the opposite.
This is equivalent to making shallower darts. You will likely need to decrease the width of the trousers slightly since your straightened waistband seam is shorter than the original curve.
Now that the Lazo seat has been made flatter to suit your bottom, you will probably still need to reduce the length of the seat seam only on the back pattern piece. This will get rid of the fabric that pools just below your bottom. This adjustment is quite easy! Just cut in to the Back pattern piece somewhere near the middle of the seat seat seam and leave a little paper ‘hinge’ near the side seam. Using the hinge, overlap the paper so that you remove the excess length. You will likely only need to overlap 1/2″ or so.

Full Tummy paired with Flat Bottom
Okay, this might seam a bit repetitive, but this combination of fit adjustments is very common so it is worth giving a category of its own so that you can recognise the problem and then head for the correct solution.
You will notice, if you sew a mock up of the Lazo Trousers, that there is excess fabric pooling around your bottom while there are diagonal wrinkle lines over your crotch…it may feel a bit intimidating to be faced with trousers that are too tight and too loose simultaneously! To top it off, your side seams will not fall straight since they are being pulled towards the front. Don’t worry, all of these issues stem from the fact that the crotch curve does not fit your body. – you need to add length to the front to accommodate your lower tummy and you need to remove length from the back since the trousers do not need to curve much over your bottom. Perform the previous two adjustments!
Full Bottom
The Lazo Trousers are drafted to fit a figure with a fairly full bottom in relation to the waist measurement (an hourglass figure). All the same, if you make a mock up and notice that there is strain across the widest point of your bottom (or, maybe you notice that fabric is pooling directly above the widest point of your bottom), you might like to give yourself a little more room. If the strain is near the waistband seam, you can create more room by exaggerating the curve of the waistband (as I illustrate in the instruction booklet). Exaggerating this curve will simultaneously add a little more width (the seam becomes longer) and more shaping. You will likely need to add more width to the pants back as well so that they can be easily sewn to this longer waistband seam.

If the widest part of your seat falls below the waistband seam or if a fairly large adjustment is needed, you will likely want to add more length to the seat seam by adding a wedge at centre back in addition to addition to the extra width. Just as I described for the Flat Bottom adjustment, slash across the back pattern piece and leave a “hinge” at the side seam. This time, spread the slash apart and redraw the seat seam curve smoothly.
Straight Figure
Someone with a straight figure will likely find that, when they choose their size based on their hip measurement, the waistband is too small for them. This is because they do not have a tapered waist. You can make small adjustments to the way the waist tapers by adjusting the side seams within the 5/8″ seam allowances so that they are much more straight.
You might like to change the style of the waistband to better suit your figure. I would recommend reducing the height of the waistband by at least 1″ or possibly even 2″ so that the pants are mid-rise instead of high rise. If you prefer not to highlight your waist, you will find this rise much more flattering!
Full Thighs
The Lazo Trousers are drafted to have very roomy thighs (due to the double pleats) so I don’t anticipate you will feel any strain across the thighs when you sew a mock up. There were a few requests for this adjustment though, so here it is in case you need it! If the pant legs are too tight at the thigh you will notice horizontal or diaganol wrinkles across the legs just below the crotch. You will also notice strain at the bottom of the slash pocket. Add more room only on the pants Front pattern piece since a large thigh is caused by a very developed muscle on the front of the leg.

Add the room by extending the crotch at the inseam. If your adjustment is fairly large it might be necessary to lower the center front waist to remove the length that unfortunately has to be added to the crotch while you are adding width. You probably won’t need to do this though – wait until you’ve sewn another mock up to see if the front crotch seam has become pouchy and too long. Here is a PDF from Sew News magazine that includes a very succinct description of this whole adjustment…in case you need a second opinion! 😛
Full Calves
Since the Lazo Trousers feature tapered legs and since the cropped variation includes wide cuffs, you will need to ensure there is enough room for your calves. You can compare the pattern pieces (minus 5/8″ seam allowances) with a comfortable pair of pants that have no stretch and a bit of roominess across the calves. Or you can sew a mock-up of the pattern as is (while working on other fit adjustments) and note if the knees or calves feel restricted when you bend your leg or flex your muscles. To add width, simply redraw the side seams and inseams from just above the knee downwards. Decrease the amount of tapering.
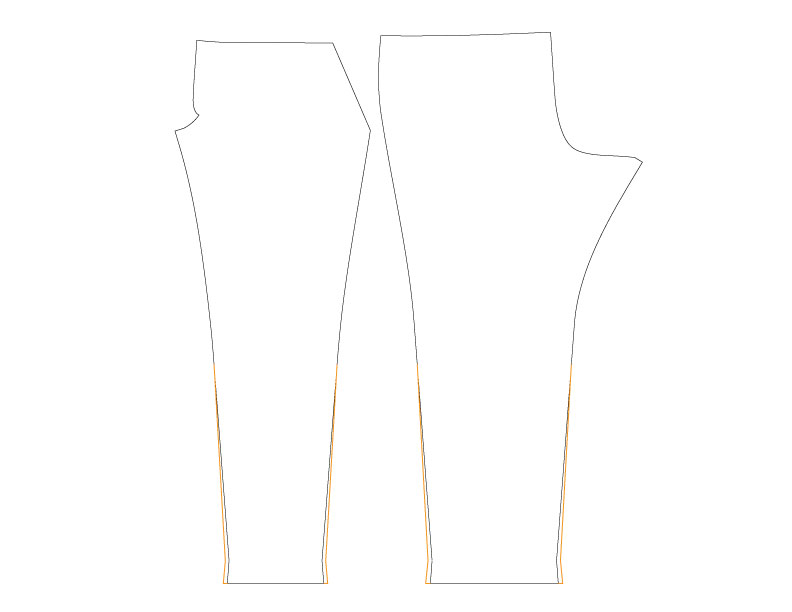
Adjusting the side seams by hand allows you to shape the trousers how you feel they will be most flattering. Make sure to add an even amount of width to the front and back, inseam and side seam so that you don’t end up with wonky twisted legs! You can avoid having to draw new seamlines by hand slashing the pattern and pivoting. This is more complicated but can be a great way to ensure your side seams remain even and straight. You can view an excellent interpretation of this adjustment (along with loads of other useful pants fitting tricks in this post on the Closet Case Files blog).
Oh, and if you are sewing the cropped variation, don’t forget that you will need to add width to the Cuff piece as well!
Whew! Did I miss anything? Keep in mind that these suggestions are simply my preferred approach to fitting and that there are MANY ways of going about fitting! Google your fit problem using this wording: _______ _______ Adjustment (i.e. Full Hip Adjustment, Flat Seat Adjustment). You will find all manner of excellent tutorials!

Let’s close for tonight by drawing the first Lazo Hack contest winner!
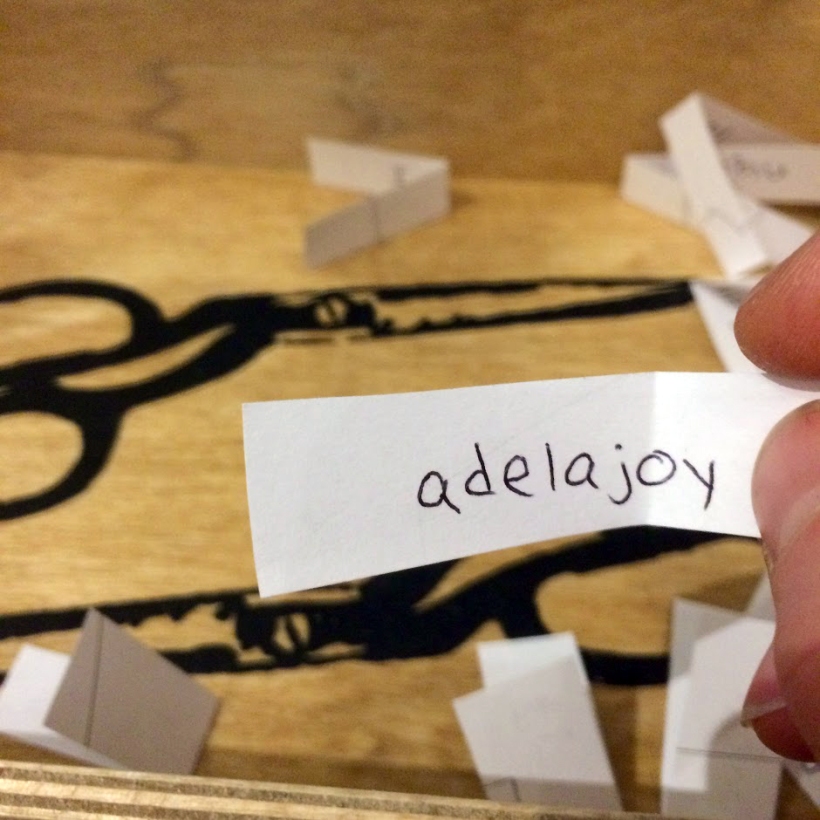
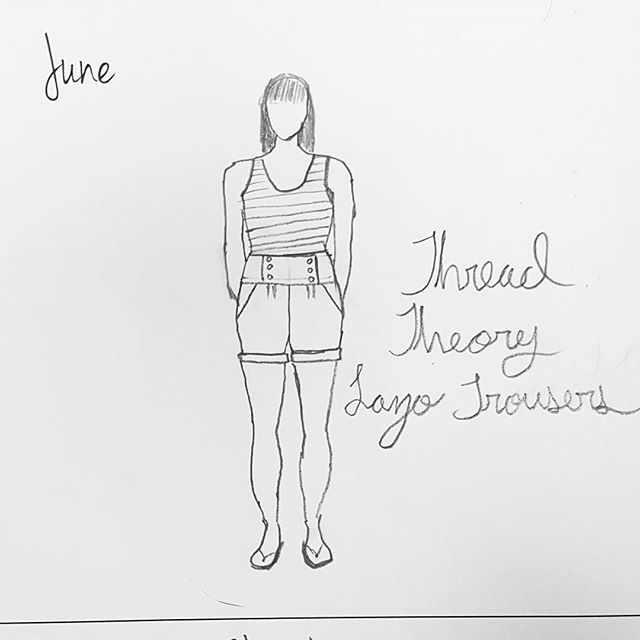
I’m pleased to announce that Robynne (@adelajoy) is the winner of a $50 (US) gift card to Stylemaker Fabrics! Congratulations and thanks for playing along! Here is her lovely sketch of a nautical pair of shorts inspired by the Lazo Trousers pattern.
She posted this entry on Instagram using #lazotrousers.
We still have three weeks of prizes to draw. Email me at info@threadtheory.ca, or use #lazotrousers on Instragram or Facebook to enter the contest. Simply share your plans for working on the Lazos or your finished Lazo masterpiece.
The next draw will be on Friday, January 13th. Enter as many times as you want for a chance to win your choice of any 3 Thread Theory PDF patterns. Which patterns are on your wishlist?

Pingback: Lazo Love – A Metre Of
Pingback: Pantsmaking Resources: Fitting and Construction
January 7, 2017 at 4:05 pm
Thank you. You covered both of my issues.
January 7, 2017 at 4:52 am
This is a great tutorial, thank-you
January 7, 2017 at 3:24 am
Brilliant, comprehensive post on altering a pattern – sure fire winner for any beginner or someone apprehensive about altering a pattern ;D