
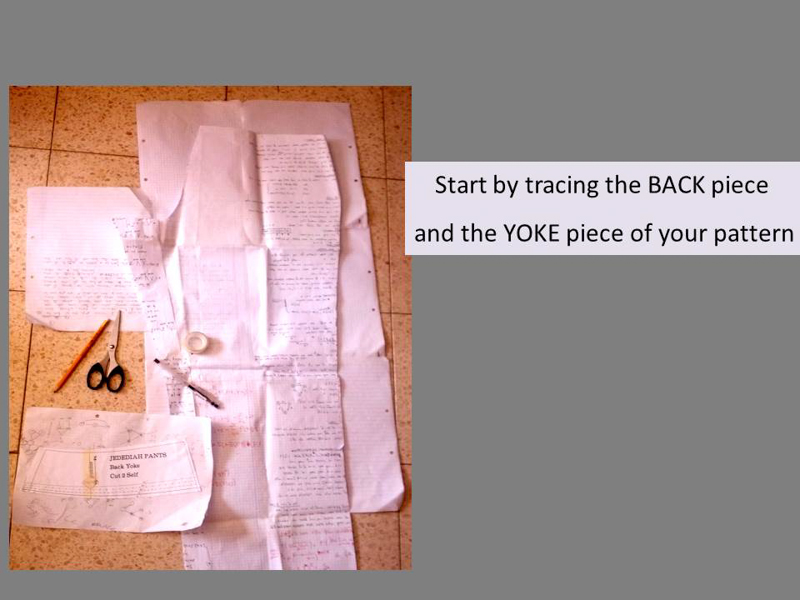
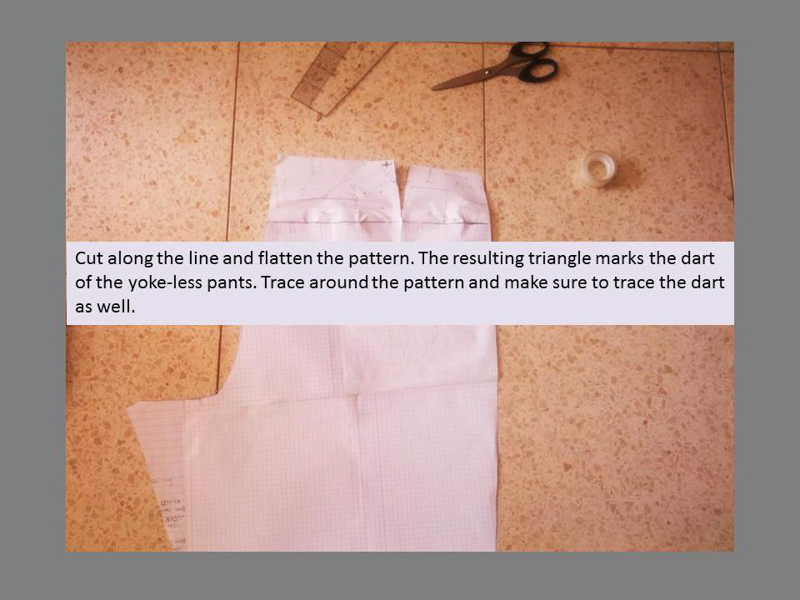
Today I have the first of three tutorials to show you (as a result of our Tutorial Contest). This tutorial was submitted after the contest deadline by Roni Arbel but it is so excellent I just HAD to include it along with the winner’s two tutorials! Now get ready for an excellent lesson in both pattern manipulation and careful sewing as Roni teaches you how to use the Jedediah Pants to create an entirely different style of pants!


Thank you, Roni, for taking the time to create such a wonderful tutorial! I love the design changes and especially love the single button on one of the welts – very professional!
Expect more great information and posts in the future on Roni’s new blog, Wardrobe Histology!
Do you have any questions about this tutorial? Ask them in the comments below and I will answer them for you. I look forward to seeing the trousers made using Roni’s excellent instructions!

Pingback: Itch to Stitch Blog Tour 2019 - The Petite Sewist
Pingback: Midsummer outfit – Mitt Lilla Lejon
Pingback: My Mother-In-Law’s latest Thread Theory sewing projects | Thread Theory
August 9, 2014 at 5:01 am
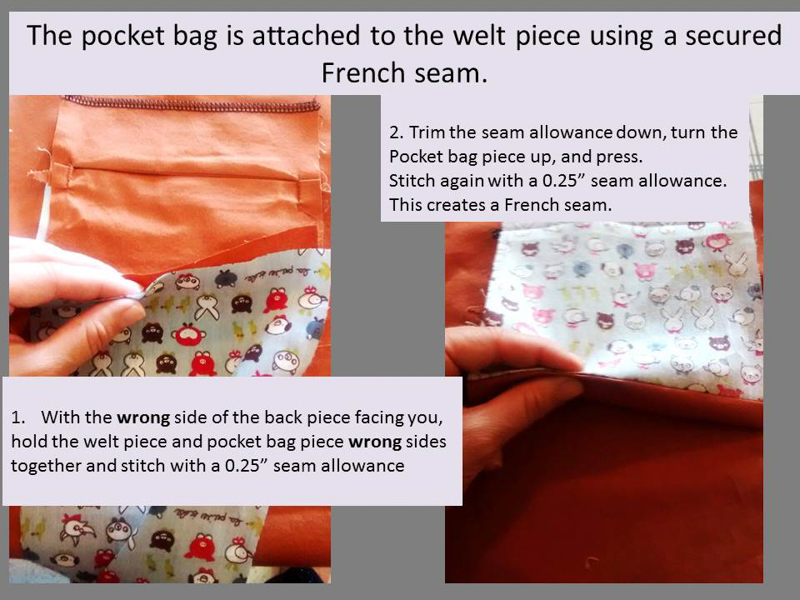
Excellent Welt Pocket Tutorial Morgan! They are my favorite type of back pockets to sew into pants.
August 9, 2014 at 1:06 am
Great tutorial! Thankyou
August 8, 2014 at 9:10 am
Very nice! %|%- a link to some pix that show how to make those French seams all around the pocket, plus my one suggestion for making your pocket stronger where it really counts (speaking as a long-time pants-wearer): At the ends of the pocket mouth. THIS is the only place I’ve ever consistently had pockets tear or fail from wear, and these tacking ideas from old-time custom pants-makers really do help. They’re done through all layers.