

It’s time to begin our Belvedere Waistcoat sew-along! During this sew-along I will be completing two waistcoats – one that requires an intermediate level of skill and one suited to beginner menswear sewists. In addition to following along with the Belvedere instruction booklet we will be trying out a variety of fitting methods and adding some bespoke details to our waistcoats.
Best of all, we will be finished on June 9th which means you will have lots of time to wrap up your waistcoat to give to your Dad on Father’s Day (June 18th)!
Here is our schedule:
Day 1 – May 19: Gathering your supplies (and Belvedere Waistcoat Supplies Kit launch!)
Day 2 – May 22: Choosing a size and thoughts on fitting
Day 3 – May 24: Customizing Part 1 – Belt and Pockets
Day 4 – May 25: Customizing Part 2 – Hem, Neckline, Collar
Day 5 – May 26: Cut out your fabric
Day 6 – May 30: Apply interfacing and sew darts
Day 7 – May 31: Assemble the lining
Day 8 – June 5: Sew the welt pockets (or add patch pockets)
Day 9 – June 7: Finish the waistcoat fronts
Day 10 – June 8: Assemble the waistcoat back
Day 11 – June 9: Add the buttons
Day 12 – June 16: Styling and Belvedere Parade
Ready for all of this?! Let’s dive in:
Supplies

A waistcoat can consist of up to three different co-ordinating fashion fabrics: The front, the back and the lining. Here are my top choices for each:


Image credit: Silk: Neal & Palmer Finest British Bespoke Tailoring Quilted: Articles of Style: Not your Grandma’s Quilt Linen and Tweed: Belvedere Pinterest board
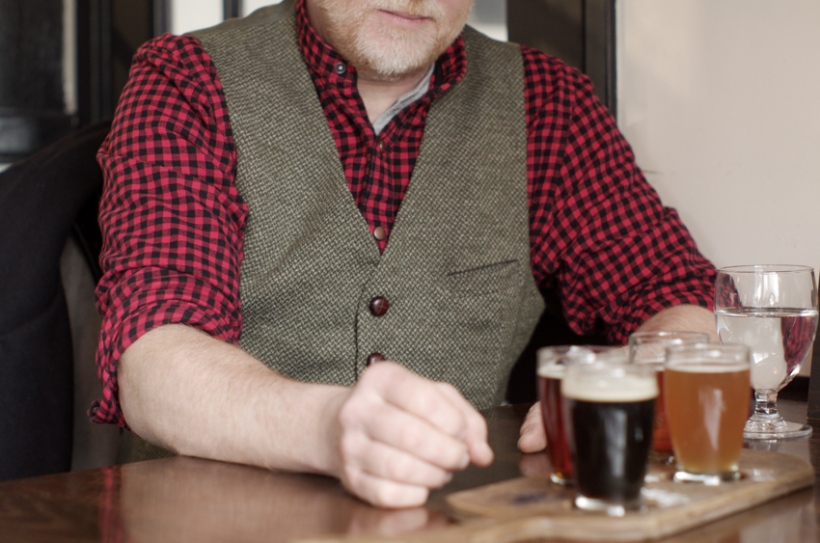
1. The Front: There are very few rules to follow when choosing this fabric! Depending on the style you are hoping to achieve you can select from a huge variety of fabric types. Choose a wool suiting for a classic waistcoat to pair with trousers for formal events. Use a wool tweed for a winter waistcoat that pairs nicely with trousers or jeans. Or use a canvas fabric (such as the hemp and cotton canvas from our shop (this is what Matt is wearing in these photos!) for a summery waistcoat perfect for weddings. Other great choices could include linen, silk, textured upholstery fabric, or even a thick and fairly stable knit! Choose whatever fabric you would like to showcase. If you are sewing welt pockets on your waistcoat, limit your choice to something that is not too bulky, does not fray exceptionally, and presses well. If you are skipping pockets, don’t worry about those limitations!

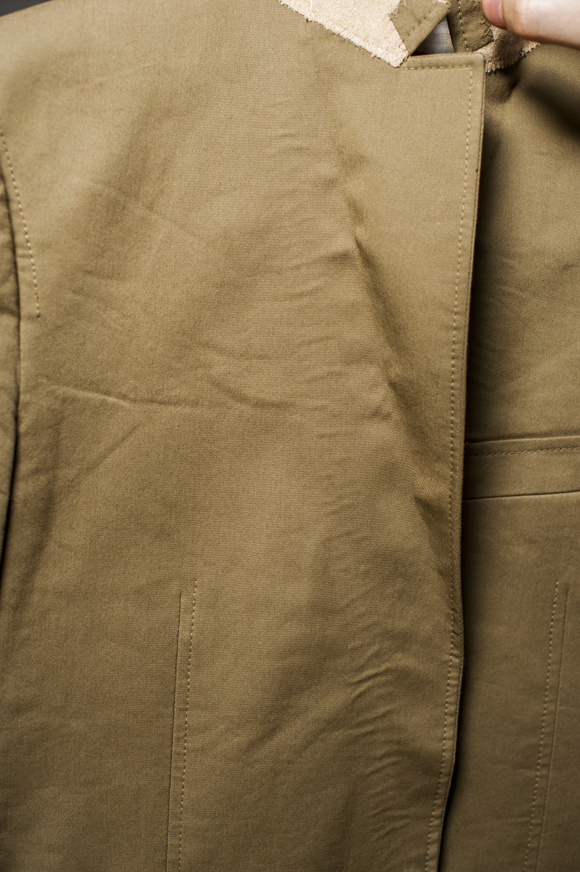
2. The Back: There are several approaches to choosing a waistcoat back fabric – choose a statement fabric, a neutral fabric or the same fabric as your waistcoat front. If you have opted for a neutral waistcoat front you could add a ‘surprise’ back as I have for Matt’s waistcoat. Choose a slippery acetate or Bemberg lining material so that it sits nicely under a suit jacket. If you have used a statement tweed or silk for your waistcoat front, choose a neutral lining material for your vest back that will coordinate nicely with the wearer’s trousers. If the waistcoat will be worn casually, without a suit jacket, it is common to use the same material as the front instead of lining fabric or you can opt for a contrast fabric that is not slippery since it doesn’t need to sit nicely under a jacket. For instance, I sewed my Dad a waistcoat with a wool knit front and a cotton canvas back (which I waxed with Otter Wax!). I didn’t get any great photos of the back – I will do so at a later point and share them with you since I love how rugged the waxed back looks!

")
3. The Lining: Select a good quality slippery lining material that will not catch on the wearer’s shirt. My favorite is Bemberg (a type of rayon lining) but acetate or silk lining will do nicely as well! While it is important to choose a strong lining fabric when sewing a suit jacket, there are very few pressure points for a waistcoat lining (because there are no sleeves) so delicate silk linings are an option.

Okay, now that our fabric choices have been made, let’s talk about structure and notions!
The entire Belvedere Waistcoat front is interfaced to create a beautifully crisp garment. The idea behind interfacing is to attach a crisp and stable fabric to your main fashion fabric to change the way that your fashion fabric behaves. For example, wool suiting tends to sag and stretch out over time; when you attach a fabric that is not prone to stretching out you will prevent your wool from looking limp, worn and sad after years of wear! Another example is silk – it is usually thin and without much body. A waistcoat front made of one layer of thin silk dupioni would likely ripple and cave when the wearer moves. It may also be quite weak and rip at the buttonholes. Adding a stronger and stiffer interfacing to the back of the silk would add more body and strength to the silk.
Because you will be interfacing a large area of fabric, it is important to pick a good quality stabiliser that suits your fabric choice and also your skill level. Here are some great pairings:


Wool fashion fabric: Use a wool canvas or hair canvas sew in stabiliser if you are proficient at padstitching (No idea what padstitching is? I will be covering this later in the sew-along!). Choose a medium to heavy weight fusible such as cotton interfacing if you would prefer an easier solution. Fusible interfacing has glue dots on one side that are melted to your fashion fabric with the heat from an iron. Test the fusible on a scrap of wool to make sure that the glue adheres to your wool.

Silk Organza: A very light weight but stable fabric. Image from Gala Fabrics.
Silk fashion fabric: Sew in silk organza by basting it to the seam allowances. Or, choose a light weight fusible but be sure to test the glue on a scrap of silk to make sure that the glue doesn’t soak through or create the appearance of visible dots on the right side of the fine silk.


Canvas fashion fabric: Most medium weight fusible interfacing will pair nicely with canvas. Make sure to pre-shrink both your canvas and your interfacing because cotton canvas, in particular, is prone to shrinking! Even if you don’t plan to machine wash your finished waistcoat, it is a good idea to pre-shrink fabrics because they could still shrink without washing. For example, you will be doing LOTS of pressing while sewing your waistcoat with a hot and steamy iron. This will shrink your canvas if it has not been pre-shrunk. Pre-shrinking fabric could include washing and drying it (sometimes several times until it stops shrinking) or thoroughly steaming it with an iron.
Bubbling occurs when fusible interfacing is no longer bonded to the main fabric. Image from Tolemans 1hr Drycleaning.
Linen fashion fabric: Linen is notorious for refusing to remain fused to fusible interfacings. The end result is the appearance of ‘bubbles’ where the interfacing and linen have detached. I would recommend using a sew-in medium weight interfacing when working with linen. Baste the interfacing in place within the seam allowances.
Lastly, it’s time to choose your buttons! There are many styles you could select for your waistcoat buttons but generally I would suggest choosing ones that are between 1/2″ to 5/8″ in diameter.

The ones pictured on Matt’s waistcoat are 5/8″ and are quite low profile making them a nice neutral choice.


I find that the more thick and textured your waistcoat fabric is, the more likely the waistcoat is to suit bulky or unusual buttons. Harris Tweed waistcoats, for example, often feature quite large braided leather buttons.
Now that I’ve overwhelmed you with all of my thoughts on material choices, let me simplify things by introducing the brand new Belvedere Waistcoat Sewing Supplies Kit!

I assembled all of my favourite materials to line, back and stabilise your waistcoat so that the only need to choose your waistcoat front fabric. The linings in this kit would pair splendidly with wool suiting but also works nicely with canvas (as pictured on Matt), silk or linen. The interfacing included is my favorite 100% cotton fusible interfacing which will work nicely for wool or canvas materials (as I mentioned above, I wouldn’t recommend a medium weight fusible for silk or linen!).

The main lining fabric featured in this kit is a delicious high end burgundy Bemberg. I’ve included enough to line the inside and create the back of the waistcoat. I’ve also included a paisley acetate lining that you can use to create a show-stopper waistcoat back or keep as a hidden special touch inside your pocket bags.

You can choose to buy the kit with or without the PDF pattern. The PDF pattern is offered at a discounted price when purchased with the kit!
In addition to the Belvedere kit, the shop includes a great selection of tailoring fabrics.
The burgundy lining materials are both available by the 1/2 m (paisley and solid) and, of course, my favourite cotton fusible interfacing is also available.
There are three new tailoring materials just added yesterday: Two stabilisers (wool and horse hair) and one lining.
I will be testing out my bespoke menswear tailoring skills by padstitching wool canvas to one of the sew-along waistcoats. I’ve added both wool canvas (left) and hair canvas (middle) to our shop so that you can join me! I may even use the hair canvas to build up the chest area…we’ll see how ambitious I am!


I’ve also added a second Bemberg lining (right) to our shop! If you prefer subtle pin stripes over bold burgundy, this is the Bemberg for you. This striped Bemberg is traditionally used as a suit jacket or coat sleeve lining. I purchased it from my favourite tailoring supplier (a lovely Italian gentlemen based in Ontario who sells predominantly to bespoke tailors) who proudly told me he is the only supplier of striped Bemberg sleeve lining in Canada. I was surprised by this statement for several reasons: What is special about striped sleeves? Why are Bemberg stripes desirable? After a little bit of Googling I soon discovered that bespoke tailors are often frustrated by how difficult it is to source good quality traditional sleeve lining. A striped sleeve lining used to be a sign that your suit jacket was traditionally tailored and not mass produced. It is more cost effective for large scale manufacturers to use one lining material for the sleeves and body of a jacket so the use of contrasting sleeve linings set the bespoke tailor apart from their industrial competition. In addition to this distinction, sleeve linings must be exceptionally smooth and strong to allow the wearer to slip their jacket on easily and to bend their arm fully without risk of tearing the material. Using a contrast Bemberg sleeve lining frees the bespoke tailor to use a more delicate lining material (patterned silk, for instance) for the jacket body.

I hope you learned something today and that you are looking forward to creating your Belvedere Waistcoat! I’ll leave you with a list of my favourite waistcoat construction resources.
- A Youtube video by Professor Pincushion which is very approachable for beginners. Learn everything about sewing a Simplicity vest pattern from reading the pattern envelope to adding easy faux welt pockets.
- A video class by Gentleman Jim suitable for intermediates. It costs $24.95 US which might seem pricey compared to free Youtube videos but I found it to be well worth the money! The pace is easy to follow and Gentleman Jim is so lovely to listen to! He is full of opinions and tricks for efficient sewing practices which are just as valuable as the waistcoat sewing instruction. It felt nice to pay directly for all of the work he put in to making the video.
- A large series of videos suitable for beginner or intermediate sewists detailing EVERY step to create a waistcoat. This series by The Sewing Guru is lengthy and detail oriented. I found the pace to be far too slow for my needs but this is a huge advantage if you are new to sewing! You will have every question answered.
- A blog post that gives a peek inside the process of fully tailoring a waistcoat. This post created by Rory Duffy of Handcraft Tailor (who I featured on the blog two weeks ago) is an interesting glimpse into the process but doesn’t fully instruct. I would recommend avoiding this post if you are fairly new to sewing (it might be overwhelming!) but it is educational and interesting if you are looking to delving in to at least a few of the tailoring techniques that he uses.

July 7, 2020 at 6:21 am
Hi, I’ve seen that you made a sew-along whereas my waistcoat was almost finished. It’s a shame because it doesn’t fit me completly. I decided to make the 3XL but as I’m 1m87, it’s obviously a bit short. And honestly, a 4XL would fit my big belly better ;). I’m french, 47yo and a beginner sewer (I began during the COVID lockdown in april). By the way, I love it ! Now I discovered this sew-along, I would adapt a little bit your pattern before doing another one. Thanks to your sew-along, I’m looking forward starting my next waistcoat a bit more customized. But first I’m doing a skirt for my daughter and a shirt for me. Thank you ! I love your waistcoat pattern ! You can see my first waistcoat on my instagram @tangi44 https://www.instagram.com/p/CCG4dWEgzfn/?utm_source=ig_web_copy_link
July 10, 2020 at 9:13 pm
Your finished waistcoat looks lovely! The contrast buttons and welts are very smart. I hope you enjoy sewing future versions tailored to your height!
May 22, 2017 at 9:53 am
I’m ready! I ordered your kit, printed the pattern (thank goodness for my local printing store and its big big printing machine). My hubby loves vests and waistcoats, so this is the perfect gift for him. Now my daughter needs one too!
May 22, 2017 at 3:21 pm
Wonderful! I’m packing up your kit today and it will head out in the mail tomorrow (it’s BC holiday today).
May 21, 2017 at 6:31 pm
I probably should have waited for your sewalong and gone with the pad-stitching for my wool version but I am now up to buttonholes and am so thrilled with how the waistcoat for my husband is turning out! Will read along for my next version 🙂
May 22, 2017 at 3:22 pm
I’m glad your first edition is turning out so well!